(转自:http://pointdeveloper.com/ionic-2-side-menu-tabs/)
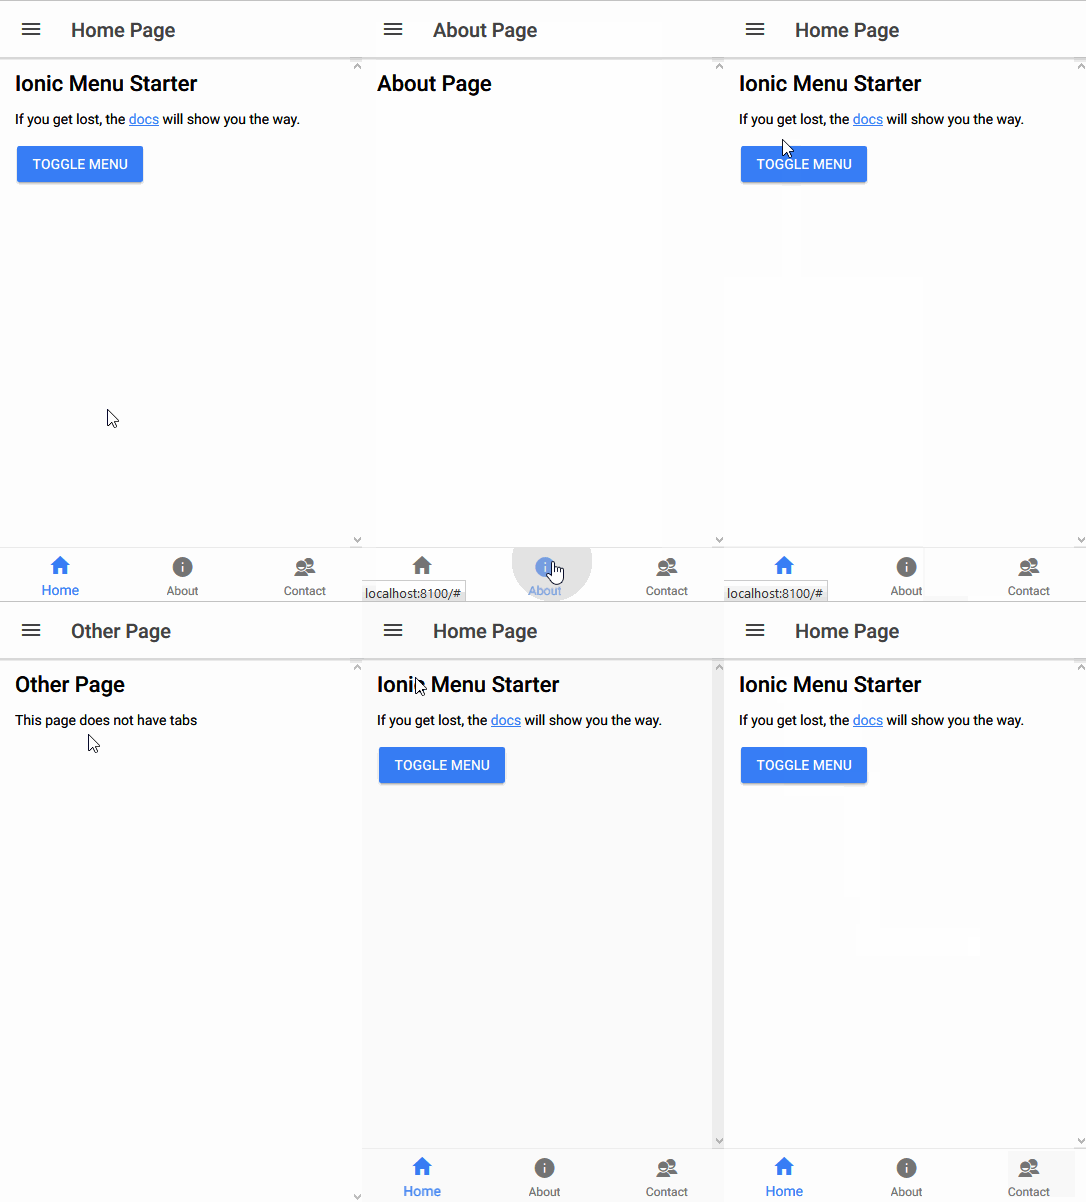
在本教程中,我将向您展示如何使用Tabs创建Side Menu。Ionic 2带有三个可以在项目中使用的模板,即blank,sidemenu和tabs。在本教程中,我们将从blank模板开始,并将sidemenu与tabs模板结合在一起。

步骤1)
打开命令提示符/终端并运行以下命令。
ionic start sidemenuTabs blank --v2
cd sidemenuTabs
在这里我们命名我们的项目sidemenuTabs。
第2步)
打开src \ app \ app.component.ts并对其进行如下代码
import { Component, ViewChild } from '@angular/core';
import { Nav, Platform } from 'ionic-angular';
import { StatusBar, Splashscreen } from 'ionic-native';

import { OtherPage } from '../pages/other/other';
import { TabsPage } from '../pages/tabs/tabs';

@Component({
  templateUrl: 'app.html'
})
export class MyApp {
  @ViewChild(Nav) nav: Nav;

  rootPage: any = TabsPage;

  pages: Array<{title: string, component: any}>;

  constructor(public platform: Platform) {
    this.initializeApp();

    // used for an example of ngFor and navigation
    this.pages = [
      { title: 'Tabs Page', component: TabsPage  },
      { title: 'Other Page', component: OtherPage }
    ];

  }

  initializeApp() {
    this.platform.ready().then(() => {
      // Okay, so the platform is ready and our plugins are available.
      // Here you can do any higher level native things you might need.
      StatusBar.styleDefault();
      Splashscreen.hide();
    });
  }

  openPage(page) {
    // Reset the content nav to have just this page
    // we wouldn't want the back button to show in this scenario
    this.nav.setRoot(page.component);
  }
}
步骤3)
打开src \ app \ app.html并放入下面的代码。
<ion-menu [content]="content">
  <ion-header>
    <ion-toolbar>
      <ion-title>Menu</ion-title>
    </ion-toolbar>
  </ion-header>

  <ion-content>
    <ion-list>
      <button menuClose ion-item *ngFor="let p of pages" (click)="openPage(p)">
        {{p.title}}
      </button>
    </ion-list>
  </ion-content>

</ion-menu>

<!-- Disable swipe-to-go-back because it's poor UX to combine STGB with side menus -->
<ion-nav [root]="rootPage" #content swipeBackEnabled="false"></ion-nav>
步骤4)
现在是时候创建一些页面了。如图所示代码到现在我们已经使用了两页,即TabsPage和OtherPage。Ionic提供了使用命令行创建页面的更大方法。确保您在项目文件夹内,现在运行以下命令。
ionic g page tabs
ionic g page other
上述命令g代表产生,它会产生页面组件TabsPage和OtherPage。您可以在此处阅读有关generate命令的更多信息。
当我们在这里时,我们创建一些我们稍后需要的页面,以及通过发出以下命令来实现
ionic g page about
ionic g page contact
总而言之,我们现在5页,about,contact,home,other,tabs。该home页面默认使用空白模板创建。
步骤5)
到目前为止,我们编写的代码只创建了sidemenu一些页面。现在是时候合并tabs模板了。
打开src \ page \ tabs \ tabs.ts并将其编码如下
import { Component } from '@angular/core';

import { HomePage } from '../home/home';
import { AboutPage } from '../about/about';
import { ContactPage } from '../contact/contact';

@Component({
  templateUrl: 'tabs.html'
})
export class TabsPage {
  // this tells the tabs component which Pages
  // should be each tab's root Page
  tab1Root: any = HomePage;
  tab2Root: any = AboutPage;
  tab3Root: any = ContactPage;

  constructor() {

  }
}
步骤6)
现在,现在是编辑tab组件的视图了。
打开src \ page \ tabs \ tabs.html 并按如下所示进行编码。
<ion-tabs>
  <ion-tab [root]="tab1Root" tabTitle="Home" tabIcon="home"></ion-tab>
  <ion-tab [root]="tab2Root" tabTitle="About" tabIcon="information-circle"></ion-tab>
  <ion-tab [root]="tab3Root" tabTitle="Contact" tabIcon="contacts"></ion-tab>
</ion-tabs>
步骤7)
对于其余的页面,我们将放置简单的占位符代码,让我们知道页面之间的区别。为此,我们将在所有页面中添加相同的代码,但是相应地更改每个页面的标题。
因此,联系页面打开src \ pages \ contact \ contact.html并按如下所示进行编码
<ion-header>
  <ion-navbar>
    <button ion-button menuToggle>
      <ion-icon name="menu"></ion-icon>
    </button>
    <ion-title>Contact Page</ion-title>
  </ion-navbar>
</ion-header>

<ion-content padding>
  <h3>Contact Page</h3>
</ion-content>
步骤8)
我们创建了所有的页面组件,但是Angular 2不会关联它,除非它们被声明@NgModule。
要这样做,打开src \ app \ app.module.ts并对其进行如下代码。
import { NgModule, ErrorHandler } from '@angular/core';
import { IonicApp, IonicModule, IonicErrorHandler } from 'ionic-angular';
import { MyApp } from './app.component';
import { HomePage } from '../pages/home/home';
import { TabsPage } from '../pages/tabs/tabs';

import { OtherPage } from '../pages/other/other';
import { AboutPage } from '../pages/about/about';
import { ContactPage } from '../pages/contact/contact';

@NgModule({
  declarations: [
    MyApp,
    TabsPage,
    OtherPage,
    HomePage,
    AboutPage,
    ContactPage
  ],
  imports: [
    IonicModule.forRoot(MyApp)
  ],
  bootstrap: [IonicApp],
  entryComponents: [
    MyApp,
    TabsPage,
    OtherPage,
    HomePage,
    AboutPage,
    ContactPage
  ],
  providers: [{provide: ErrorHandler, useClass: IonicErrorHandler}]
})
export class AppModule {}
这里我们将所有页面添加到declarations数组以及entryComponents数组。
要记住的是,我们已经在侧面菜单中创建了选项卡组件。这意味着整个选项卡组件将在ion-nav标签中的侧面菜单模板中显示为一个页面。标签组件中加载的页面将被加载到ion-tab标签中。
结论
在我看来,Side Menu和Tabs模板的组合应该是一个ionic模板。但是,正如你刚刚看到的那样,并不是太复杂。要记住的一件事是,一旦你有这样一个嵌套的模板处理,后退按钮需要特别的注意,因为用户可能想回去上一个选项卡,但可能会回到一页。
如果您想立即开始使用,可以使用以下命令创建一个新的ionic项目,以获取sidemenuTabs模板。
ionic start sidemenuTabs https://github.com/pointdeveloper/ionic-2-sidemenu-tabs --v2


